Drum Overhead Techniques for Incredible Sounding Drums
Six practical stereo overhead setups for recording drums, from tight mono-safe XY to wide spaced pairs, ORTF, mid-side, and Recorderman.

Short answer
Drum overheads often carry the big picture of the kit. XY keeps phase tight, spaced pairs sound wide but need checking, ORTF lands between the two, mid-side gives a controllable mono-safe image, and Recorderman keeps the kick and snare centered with simple distance checks.
Key takeaways
- Use XY when mono compatibility matters more than a wide image.
- Use spaced pairs when you want width, but check kick and snare placement before committing.
- ORTF is a useful middle ground: wider than XY, less fragile than a wide spaced pair.
- Mid-side and Recorderman are strong choices when you want a focused center and controlled phase.
Start with the big picture
I like to think of drum overheads as the big picture of the kit. Close mics can add punch and detail, but the overhead placement often decides whether the kit feels like one instrument or a pile of separate drums.
The right setup depends on the song, room, drummer, and mix direction. These are the overhead techniques I reach for when I want a reliable starting point.
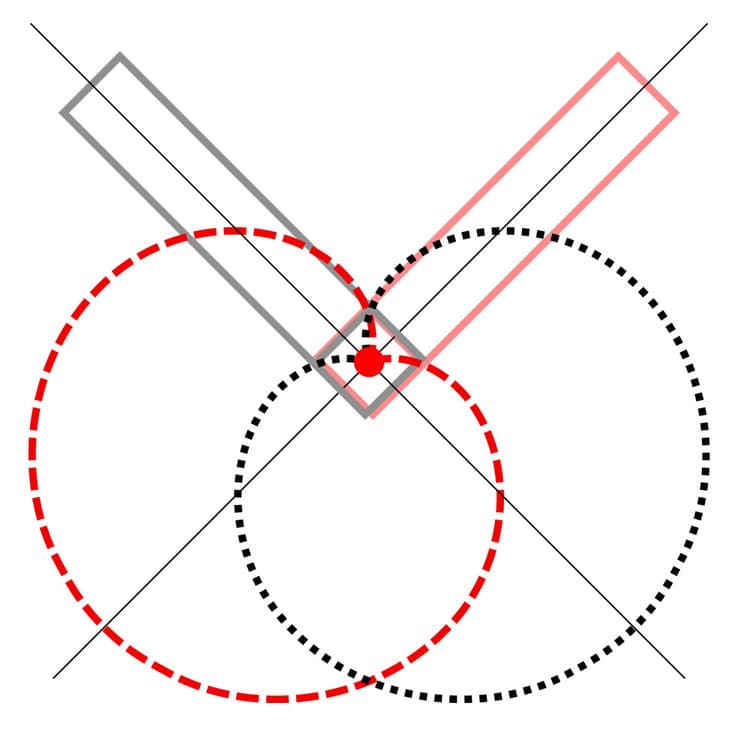
XY
Put the mics beside each other above the kit with the capsules close together, angled like a V. One mic points toward one side of the kit, and the other points toward the opposite side.
The advantage is phase. Because the capsules are nearly in the same place, the stereo pair usually folds down to mono with very little loss. The tradeoff is width: XY sounds tighter than most spaced techniques.
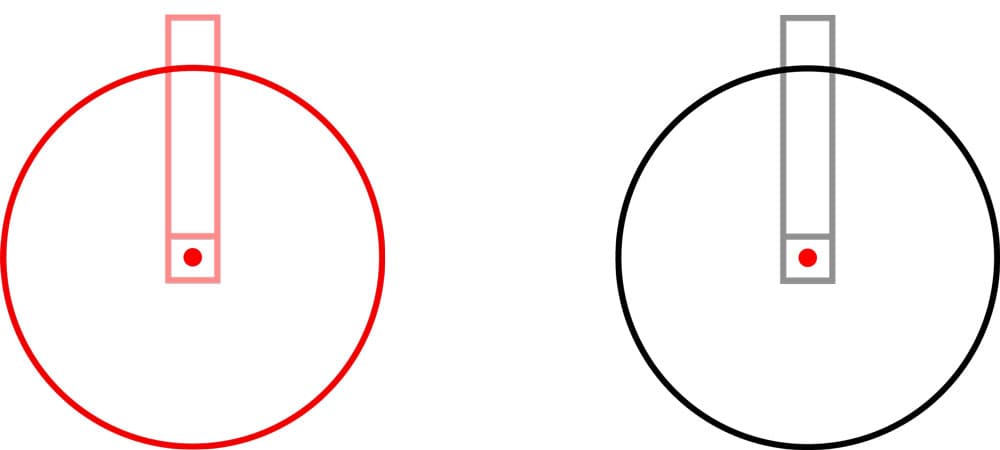
Spaced pair
This is probably the most common overhead setup. One mic sits over the left side of the kit and one sits over the right side, with each mic capturing its side of the drummer's image.
Spaced pairs can sound wide and exciting, but they can also introduce phase problems and odd panning. If the snare is equal in both mics, the kick and toms may land off-center. Before you move on, check the pair in mono and listen for where the kick and snare sit.
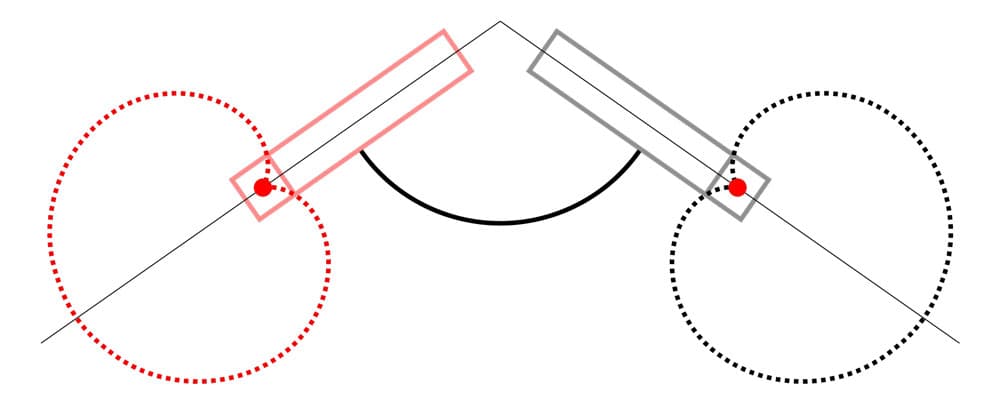
ORTF
ORTF is close to XY, but the capsules are spaced apart. A typical setup puts about 17 cm between the capsules and angles the microphones roughly 110 degrees apart.
The result is wider than XY, but usually less phase-sensitive than a full spaced pair. When I want a natural stereo picture without going too wide, ORTF is a good middle ground.
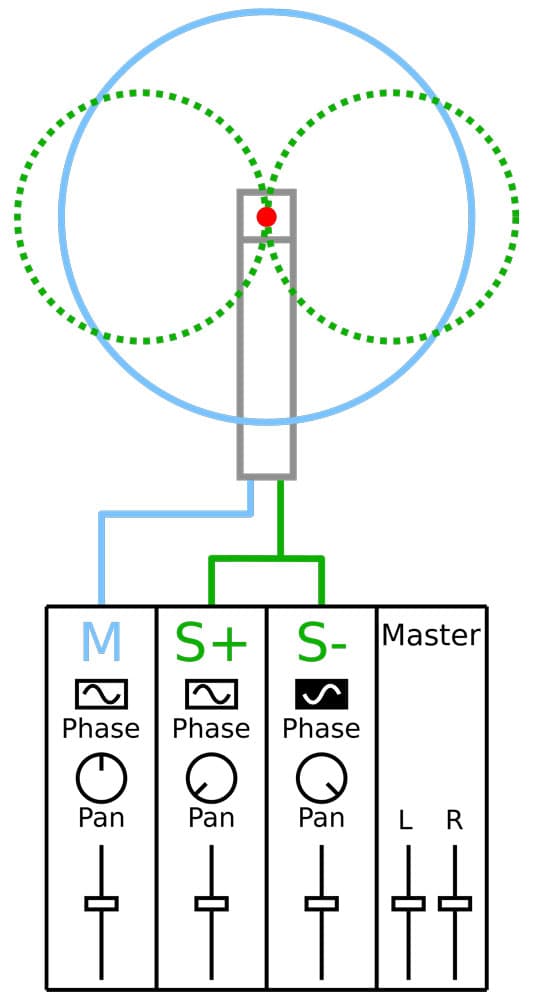
Mid-side
Mid-side can give you a wide image that still collapses to mono in a controlled way. The mid mic is usually a cardioid pointed directly at the source, often the snare. The side mic is a figure-8 microphone placed perpendicular to the mid mic.
In the DAW, duplicate the side mic, hard pan the two side channels left and right, and flip polarity on one of them. Keep the mid mic centered. When summed to mono, the side channels cancel and the mid channel remains, so the image adapts cleanly.
Recorderman
Recorderman is stranger, but it solves a real problem. One microphone goes roughly 32 inches above the snare, pointing at it. The other goes over the drummer's right shoulder, also pointing at the snare.
Use a cable or string to match the distance from the kick and snare to both microphones. The goal is a wide image with the kick and snare still centered, plus fewer mono phase problems than a casual spaced pair.
If you want the original walkthrough, the classic reference is the Recorderman setup video.